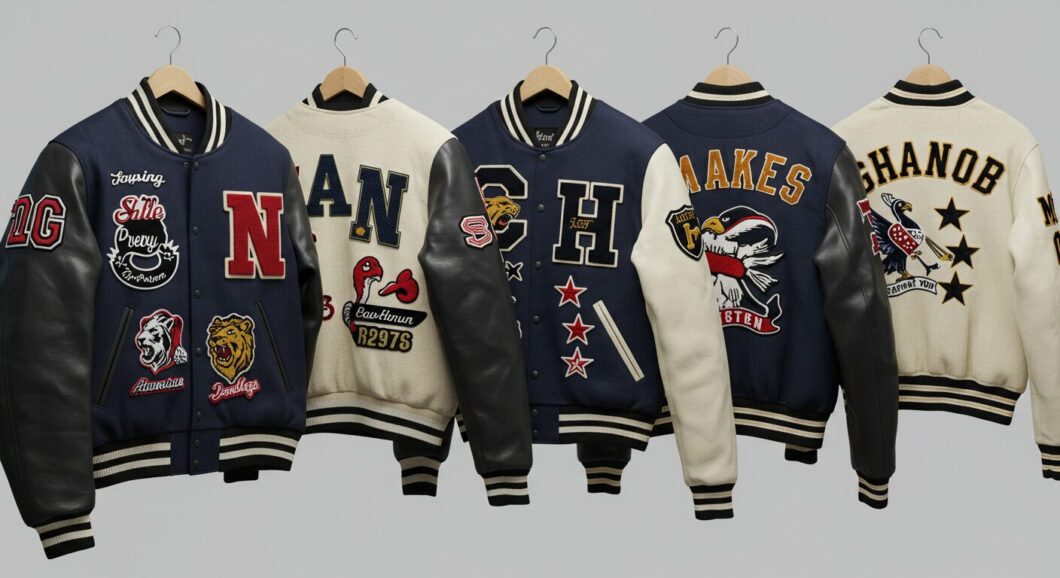
Varsity jackets are more than just outerwear — they’re a symbol of pride, achievement, and personal style. One of the best ways to customize your varsity jacket is by adding patches that reflect your story. Whether it’s your school logo, sports team, nickname, or a personal design, patches add character and make your jacket uniquely yours.
At NovoJackets.com, we believe your jacket should be as bold as your achievements. Here’s how you can put patches on your varsity jacket the right way.

Step 1: Choose the Right Patches
Before you start, decide what kind of patches you want:
-
Chenille patches – Classic varsity style, great for letters and numbers.
-
Embroidered patches – Detailed and vibrant.
-
PVC or leather patches – For a more modern, edgy look.
-
Iron-on or sew-on patches – Choose based on how permanent and durable you want the patch to be.
Pro Tip: Pick patches that match your jacket’s material and color scheme for a balanced look.
Step 2: Plan Your Layout
Lay your jacket flat on a clean surface. Position your patches where you want them to go — commonly used spots include:
-
Left chest (initials, logos)
-
Sleeves (team numbers, flags)
-
Back (name, mascots)
Take a photo of your layout so you can replicate it perfectly when attaching.
Step 3: Choose the Right Application Method
1. Iron-On Method
Ideal for temporary or decorative patches.
What You Need:
-
Iron-on patches
-
Iron
-
Thin cloth or towel
Steps:
-
Heat the iron to the recommended setting (usually cotton or high heat).
-
Place the patch where you want it.
-
Cover it with a cloth.
-
Press firmly for 20–30 seconds.
-
Let it cool.
Note: Not all varsity jackets are suitable for ironing, especially if they have leather sleeves. Always check the care label.
2. Sew-On Method
Best for permanent, heavy-duty patches.
What You Need:
-
Needle and thread (or sewing machine)
-
Pins
-
Thimble (optional)
Steps:
-
Pin the patch in place.
-
Stitch around the edges securely.
-
For thicker patches, use a heavy-duty needle or machine.
3. Fabric Glue or Adhesive
Good for patches that you might want to remove later.
Steps:
-
Apply glue to the back of the patch.
-
Press firmly on the jacket.
-
Let it dry for 24 hours.
Warning: Adhesive can wear off after washes.
Step 4: Add the Final Touches
Once your patches are on, let your jacket sit flat for a few hours. For iron-on or glue methods, avoid washing the jacket for at least 48 hours to ensure the patch sticks well.
Design patches for Your Varsity Jacket Now
Patch Types and Styles Guide
Link to: https://www.patchcollection.com
Use for: Explaining different types of patches (embroidered, chenille, etc.)